You can get data from Glasshouse directly to Revit via the Glasshouse Revit plug-in.
You can always get the newest version of the plug-in here.
This proces is often referred to as “Import to Revit” or “Data to objects”.
Before you do this the first time you need to setup Glasshouse and Revit, so you are sure what you are transferring.
Setting up
Glasshouse setup
In Glasshouse set up one or more Glasshouse views, containing the data yo want to synchronise.
For each of these “Sync” views, use the following settings:
- Use “Short description” as the first column – it makes it easier to review.
- Add the properties you want to transfer to Revit.
- Use the filter if you wish to narrow down the journal entries yo want to target.
This way you can control which objects gets which pieces of data, instead of a one-size-fits-all. - Add “Category”, “Family name” and “Type name” if you want Glasshouse to guess on mapping, for Revit objects that are not linked yet.
This is not mandatory.
You can now review the data you will sendt to Revit in each of the view – just to be sure 🙂
Revit setup
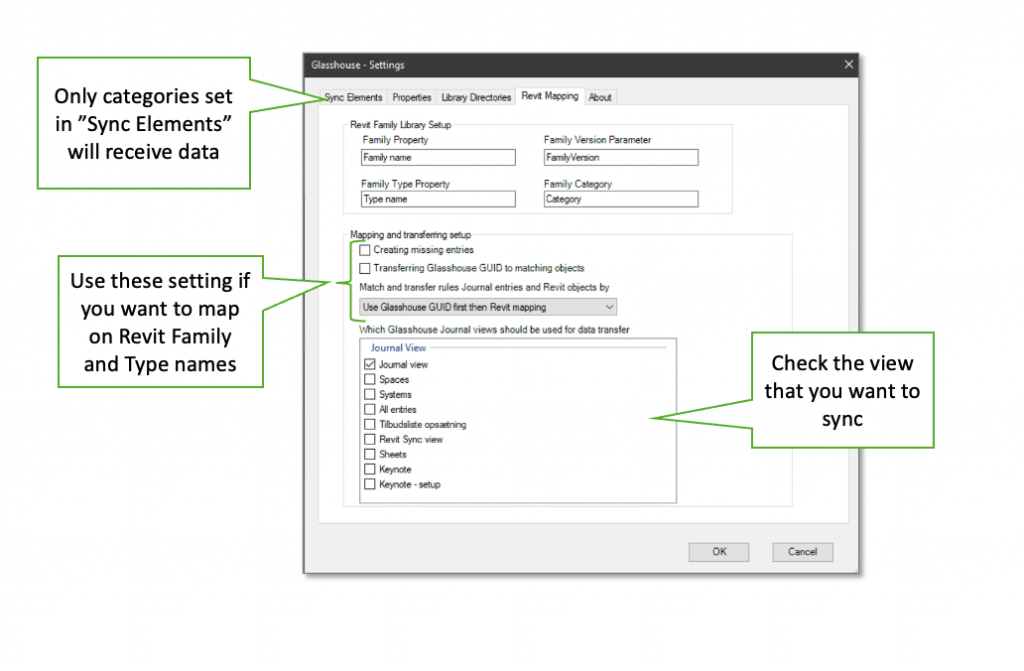
In Revit open the “Settings” dialogue in the Glasshouse Ribbon, and browse to the “Revit Mapping” tab.
In tabs dialogue you can set which Glasshouse views in the list you want to synchronise – multiple journal views can be chosen.
When you are done click “ok”. The settings will be stored in the Revit file for next time.
Get data to Revit
Each time you wish to get data from Glasshouse to Revit, perform these two steps:
- Make sure the link data between Revit and Glasshouse in synced.
As minimum do a “Quick Import” from the Glasshouse ribbon once in a while.
You can see the result, as the “GlasshouseJournalGUID” parameter has a value added on linked families (paraemters is on instance level as default).
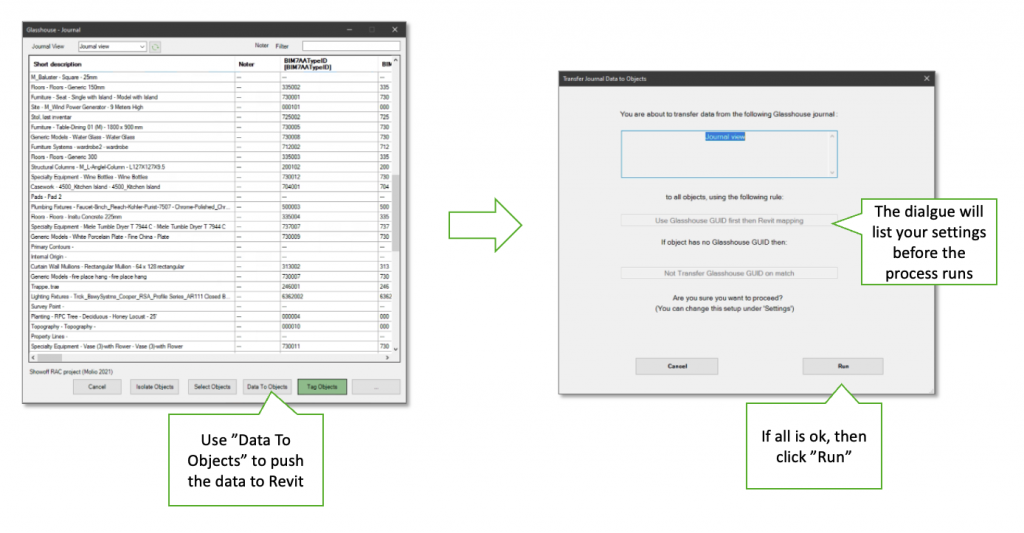
This point is not mandatory, but may give you a better result. - Open the “Journal” window from the Glasshouse Ribbon, and click the “Data to Objects” button.
You will now see a dialogue that sums up on the settings.
If all is ok, then click “Run” - A progress bar will now show how the process is running, when it’s done the data is on your objects.