On this page we will look at the following:
- How to create your first project
- How to navigate in GLASSHOUSE
If you want to learn about the very basic functions of the user interface, you can read about them on this page.
Create your first project
Once you have logged into GLASSHOUSE you will be welcomed by this page. Click on ‘Create project’ to get started with your project
GLASSHOUSE Welcome page
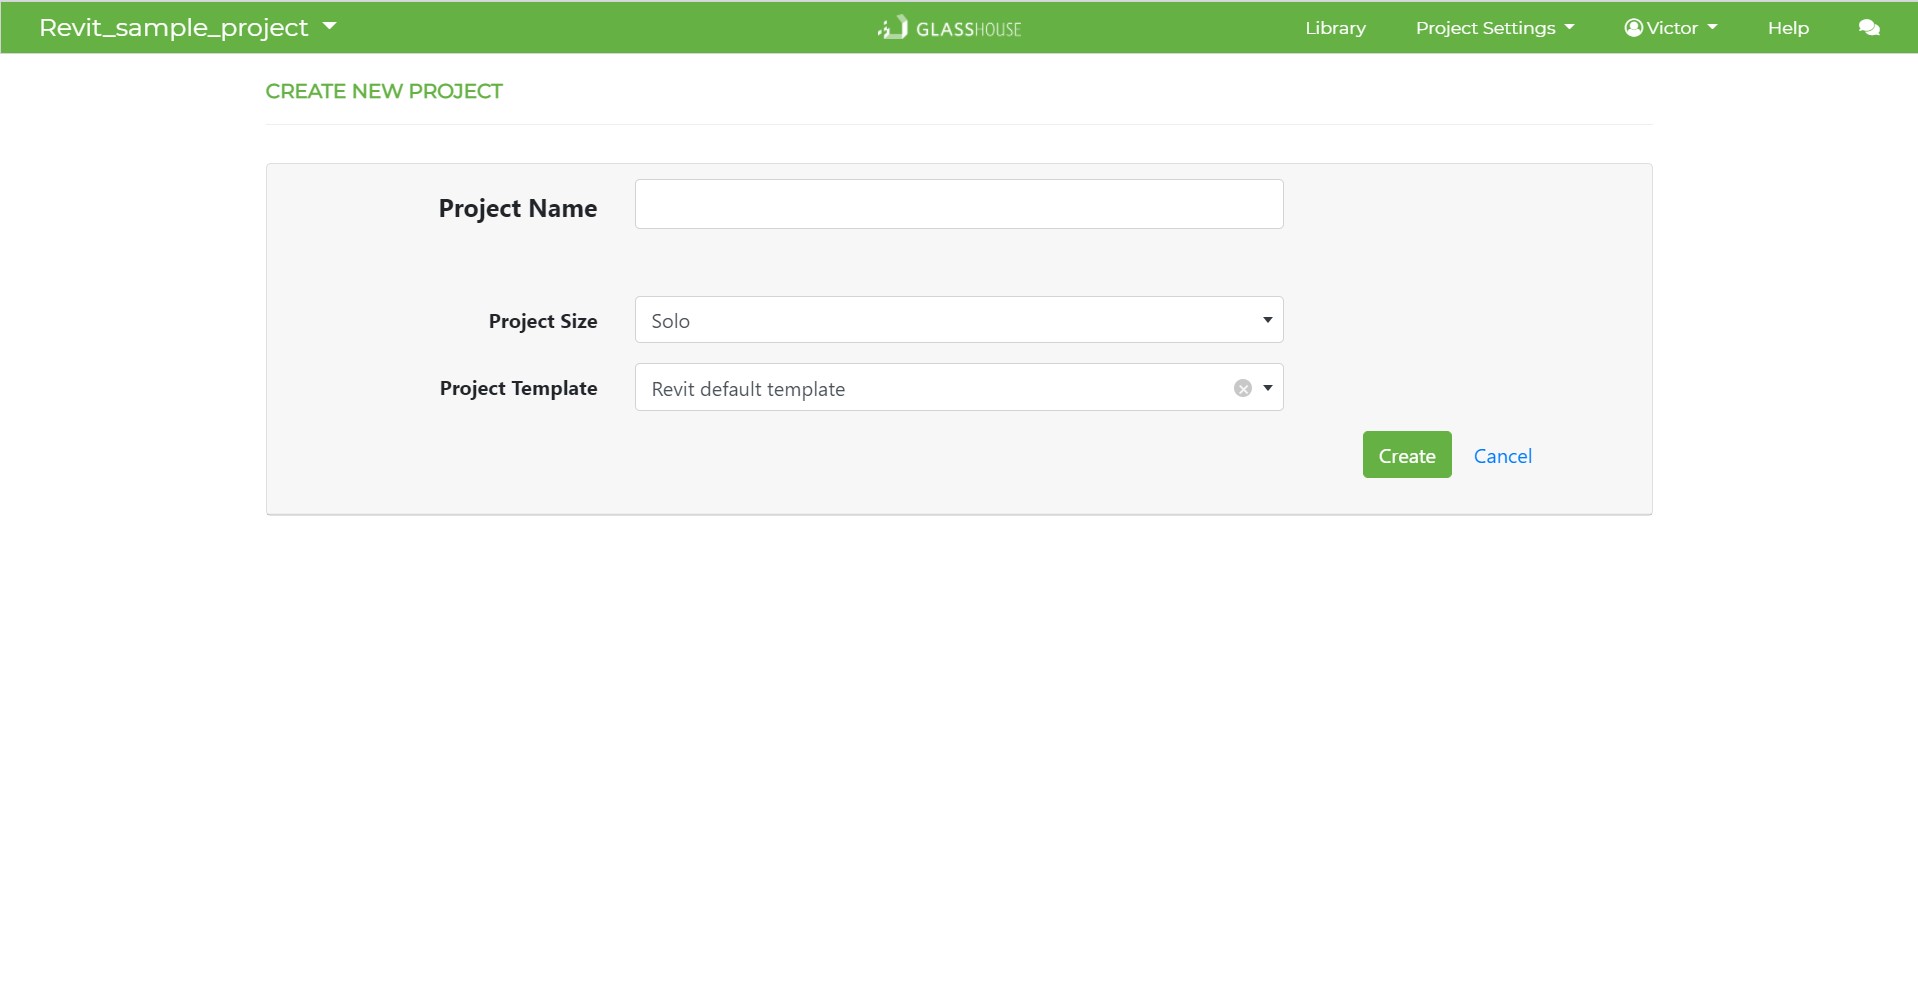
New project page
When you create your first project, you only need to enter the project name initially. You have the option to add the rest of the fields later, inside the project settings.
It is already possible to upload your model to Glasshouse. If you wish to do so, we recommend you to look at Step 5: Import your BIM model. But as a first time user we recommend to wait.
When you are ready press ‘Create’ and the project will be created and you will be taken to the project welcome page.
From here we move on to the next step Step 3: Create your building parts record where we’ll look more at how to get started quickly with creating a record of the building parts in your project.
But before you get started with this, we recommend that you take 5 minutes to go through the section below so that you become comfortable navigating around Glasshouse.
[NOTE] The guides below are based on Glasshouse v2.0, click here for more information.Learn how to navigate in GLASSHOUSE
The top ribbon of GLASSHOUSE is used to navigate around. In the pictures below you can see a short description of what you can do by clicking on the different buttons.
Navigation menu
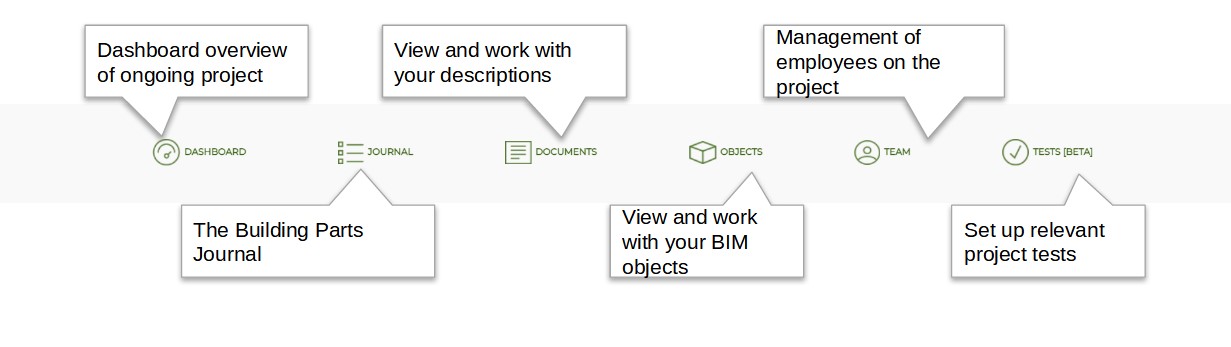
Overview of the navigation menu in GLASSHOUSE.
The gray band at the top of the screen is the navigation menu, which provides access to the most frequently used functions and areas of the current project.
- Here you can choose between:
- Dashboard. This gives you an overview of the current project. Here you can see recent activity and the status of your model, descriptions, etc.
- Journal. GLASSHOUSE’s building part journal, which is the heart of your project and where you can link your descriptions, BIM model and tender lists
- Documents. Here you can view and work with your documents such as work and building part descriptions.
- Objects. Here you can work in depth with your BIM objects imported from your BIM model.
- Team. Here you can invite your colleagues to the project, or manage the already invited users
- Tests [BETA]. Here you can set up different tests to compare things in your project.
Top menu
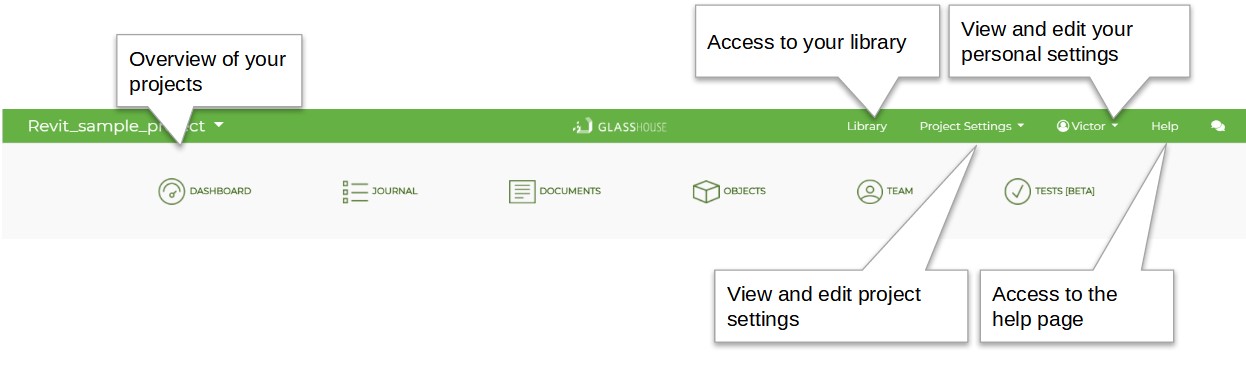
Brief description of the top GLASSHOUSE menu.
The top green band is called the top menu, and contains a number of functions used to navigate between project and user-specific settings.
Here you can choose between:
- Projects. In the top left corner you can see which project you are in. Clicking on the font brings up a drop down menu where you can view the most recent projects, or access all your projects, including those others have invited you to. This is also where you can create new projects.
- Library. Here you can access your library, where you can save descriptions and reuse them across projects.
- Project settings. Shortcuts to a range of key project settings, which can be selected from a drop-down menu. This is described below.
- User. Here you can set your user information or log out of GLASSHOUSE.
- Help. Links to the help pages that you are on now.
Project settings
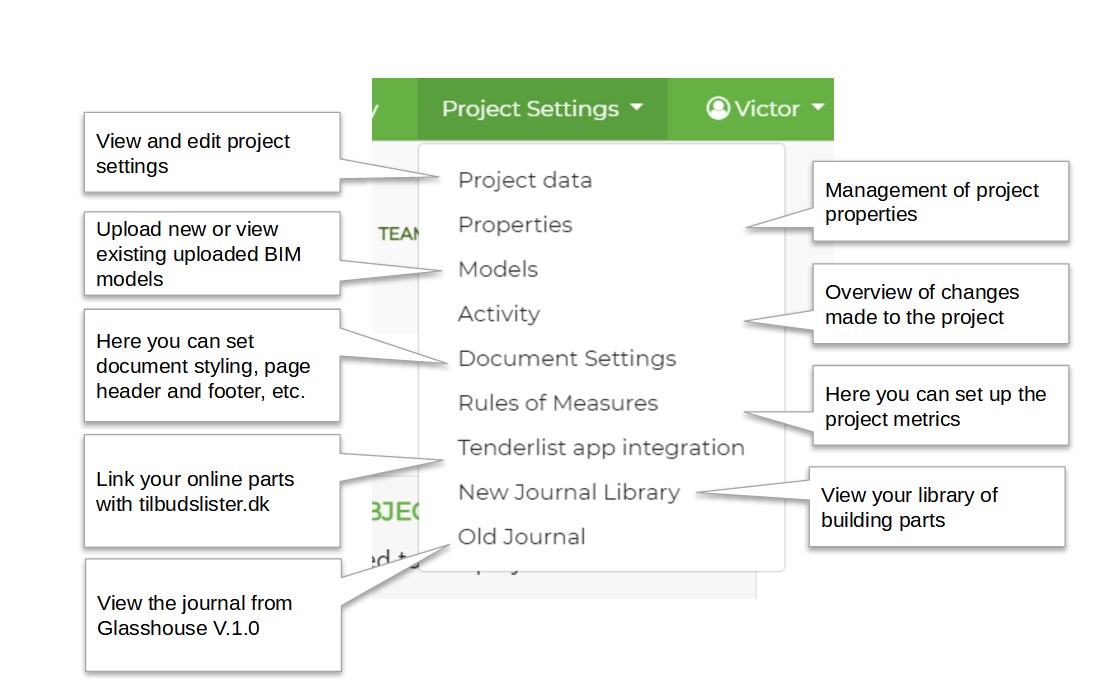
Description of the project settings menu.
In the project settings drop down menu there are various functions you need to use to set up your project.
- Project data. Here you can view and change the name of the project, client, architect etc.
- Properties. Here you have the possibility to edit the properties you need to include in your project. Once you have uploaded your model to GLASSHOUSE, it is on this page that you will have the opportunity to edit the imported parameters that have come from your BIM model.
- Models. On this page you can upload a new BIM model or get an overview of the models that have been uploaded for your project.
- Activity log. The activity log allows you to see when changes have been made to your project and who made the changes.
- Document settings. Here you can set up your descriptions so that it affects all descriptions in your project. You can set styling, page header and footer etc.
- Measurement rules. Once you have uploaded your model, GLASSHOUSE guesses which units your objects are measured in. In Measurement Rules you will be able to correct how the objects are measured.
- Tilbudslister integration. Here you can set up your Bid List integration so that your building parts are pushed over the way you want.
- New Journal Library. View your library of building parts. if you have saved a building part to your library it is possible to find it here and import it into your new project
- Old Journal.
View the journal from Glasshouse V1.0. This is not relevant if you have started up a project in Glasshouse V2.0.
Click back to previous step: Step 1: How to get started with GLASSHOUSE
Click through to the next step: Step 3: Create your building part record