This page reviews:
- How to navigate the Journal.
- How to create a building part.
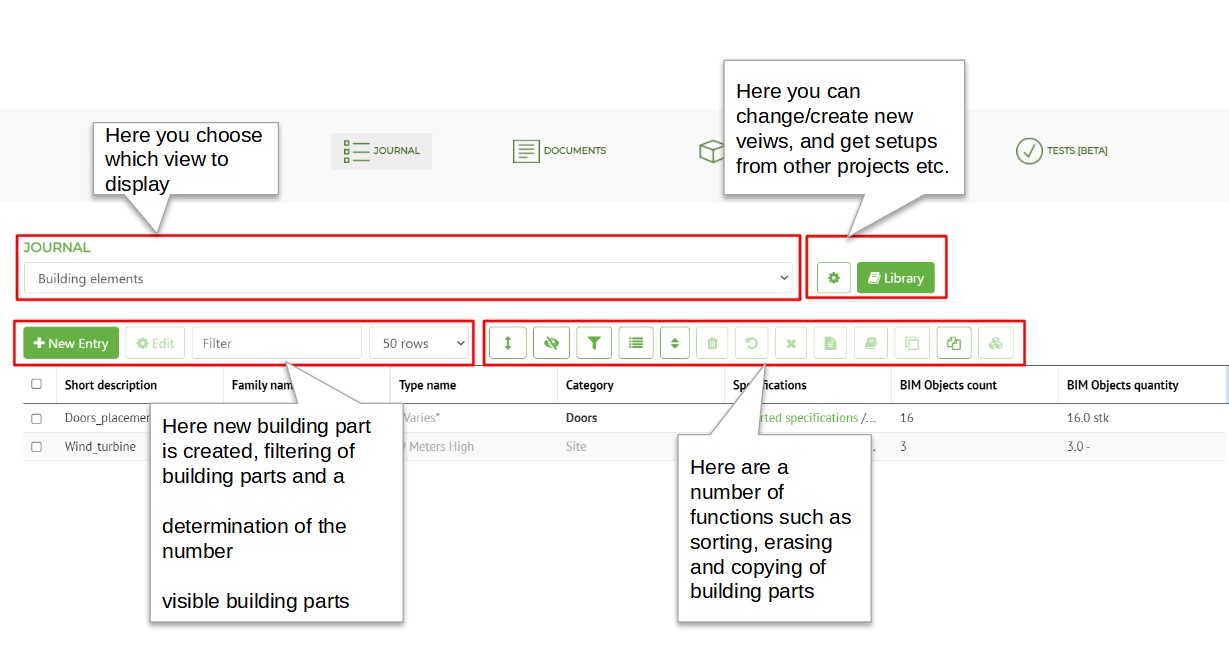
- How to create different views.
The primary focus of this step is starting up the Journal, and in the following steps we will look at how the Journal is linked to the Model, Descriptions and Quotation Lists.
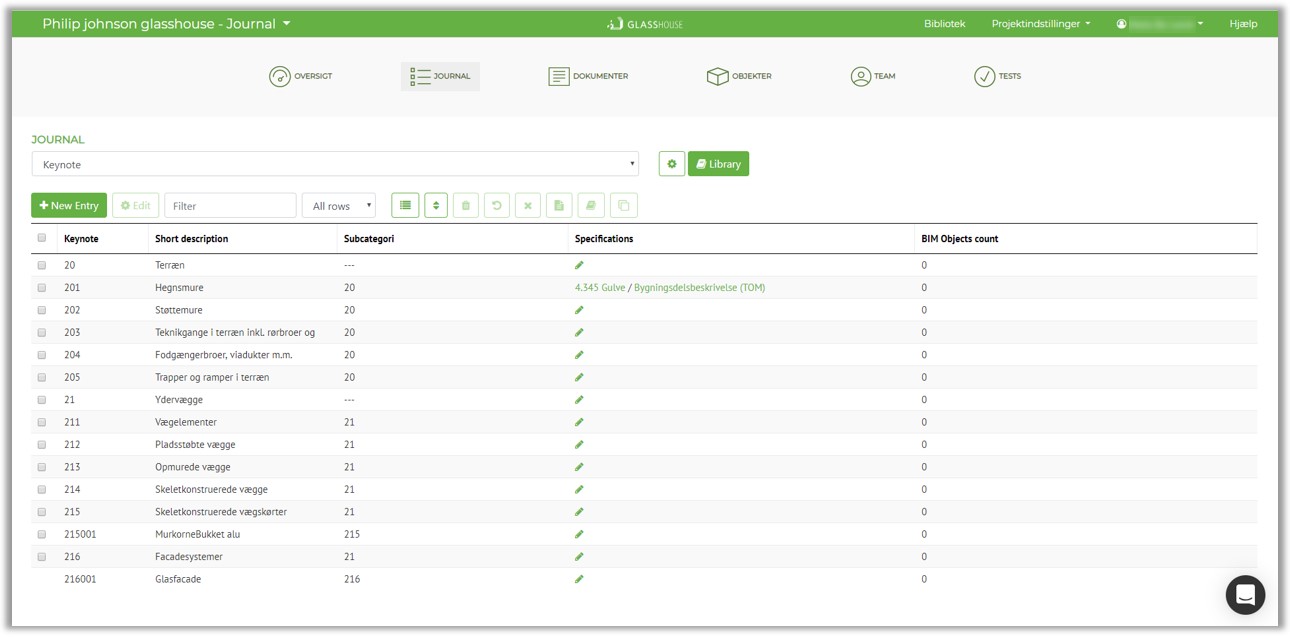
Navigating the building parts journal
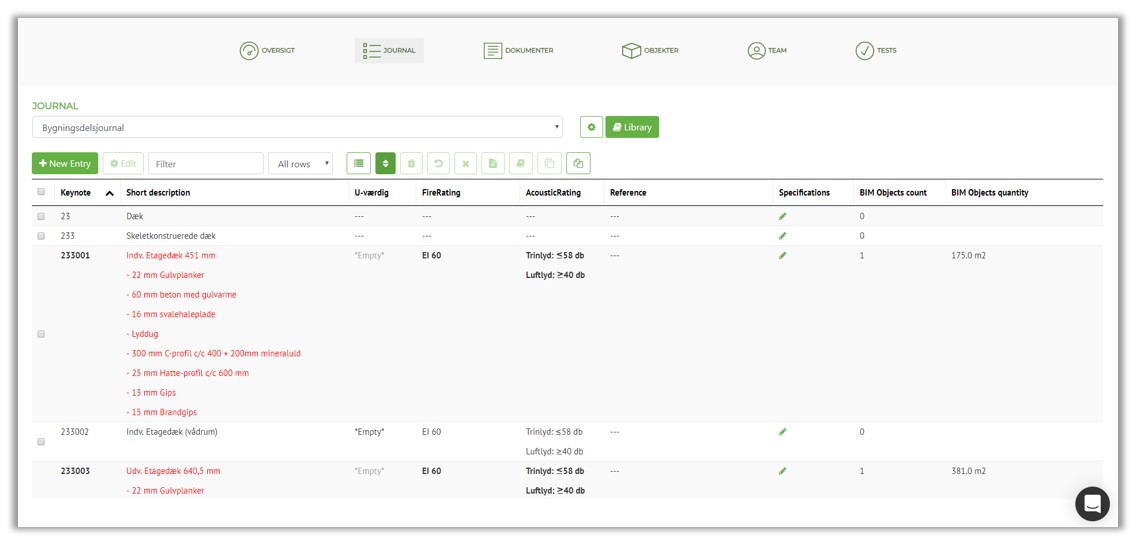
The journal acts as the heart of your project when using GLASSHOUSE. Here you have the opportunity to get an overview of all building parts you use in a given project.
Once you have accessed your Journal, a view with a number of columns will automatically be set up. This view and columns are a default setup and can be changed as needed.
Create your first building part
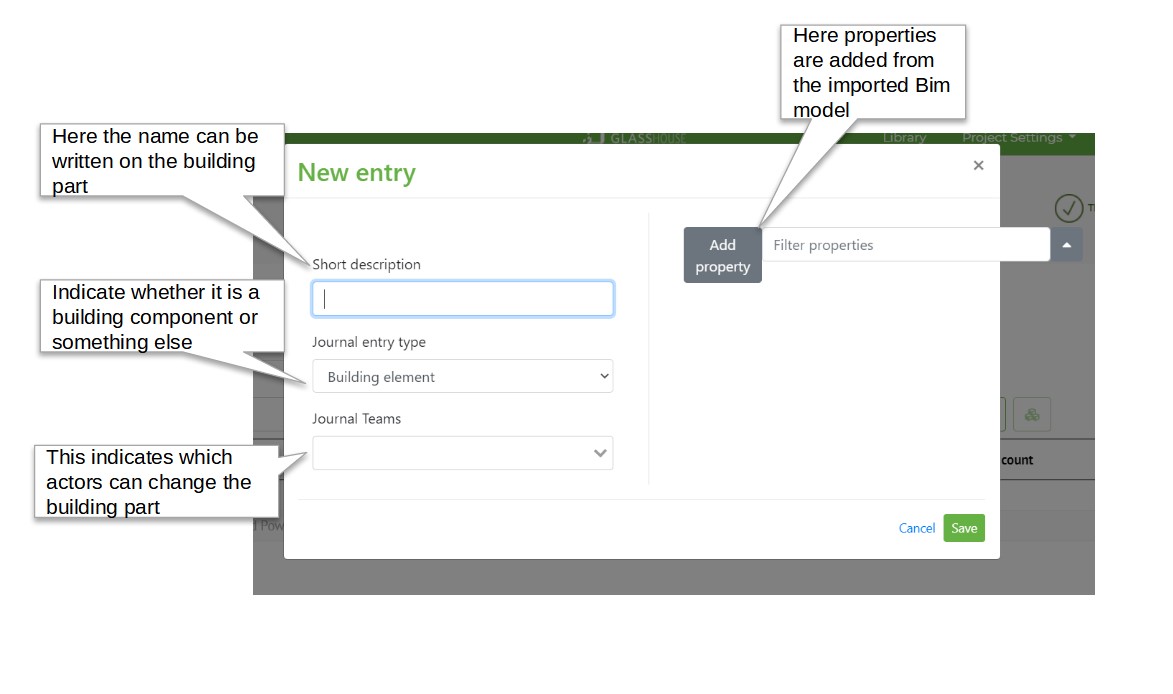
To create your first building part press ‘+New Entry’ after which a window similar to the image below will pop up
When you begin your first building part, you can start by entering building parts as notes. That is, you don’t need to have the final description of the building part ready from the start. You can always fill in more as your project becomes more detailed. Therefore the name is more than enough to start with.
- GUID. The GUID is the unique code that binds the building part to an object in the Bim model. If the building part is not bound to an object this will be empty. For more information about linking building parts to objects click here
Review GUID, also redirects to video in Danish, could be useful to have similar information available in English
- Journal entry type. This indicates whether the entry is a building part, a room or a system.
- Journal teams. Here you specify which actors can modify the building part. This is advantageous in larger projects where many actors are inside the building part journal.
- Short description. Here you can write the name of the building part, and a possible building description, it is entirely up to you what this will be used for.
- Add property. This is only visible when a Bim model is imported. Here you can add extra properties that are imported directly from the Bim model. These and the ‘Short description’ will be the ones that form columns in the record.
Use of Views
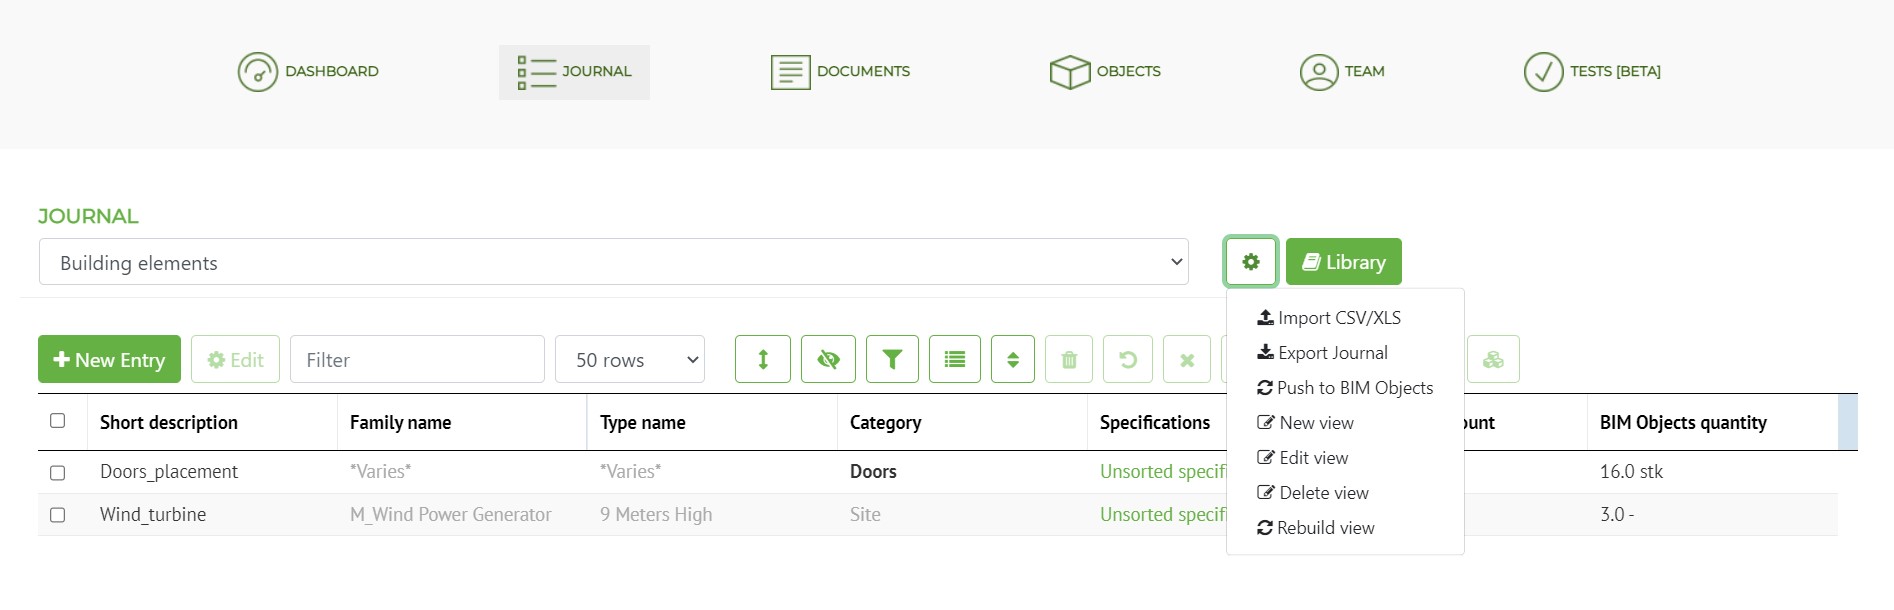
Views are an easy and clear way to switch between different schema. By default there are 4 views, All entries, Building elements, Spaces and Systems. Each of which filters on ‘Journal entry type’. There may be a need to create journals for doors, windows, walls, rooms etc. to do this press the cog and then ‘new view’
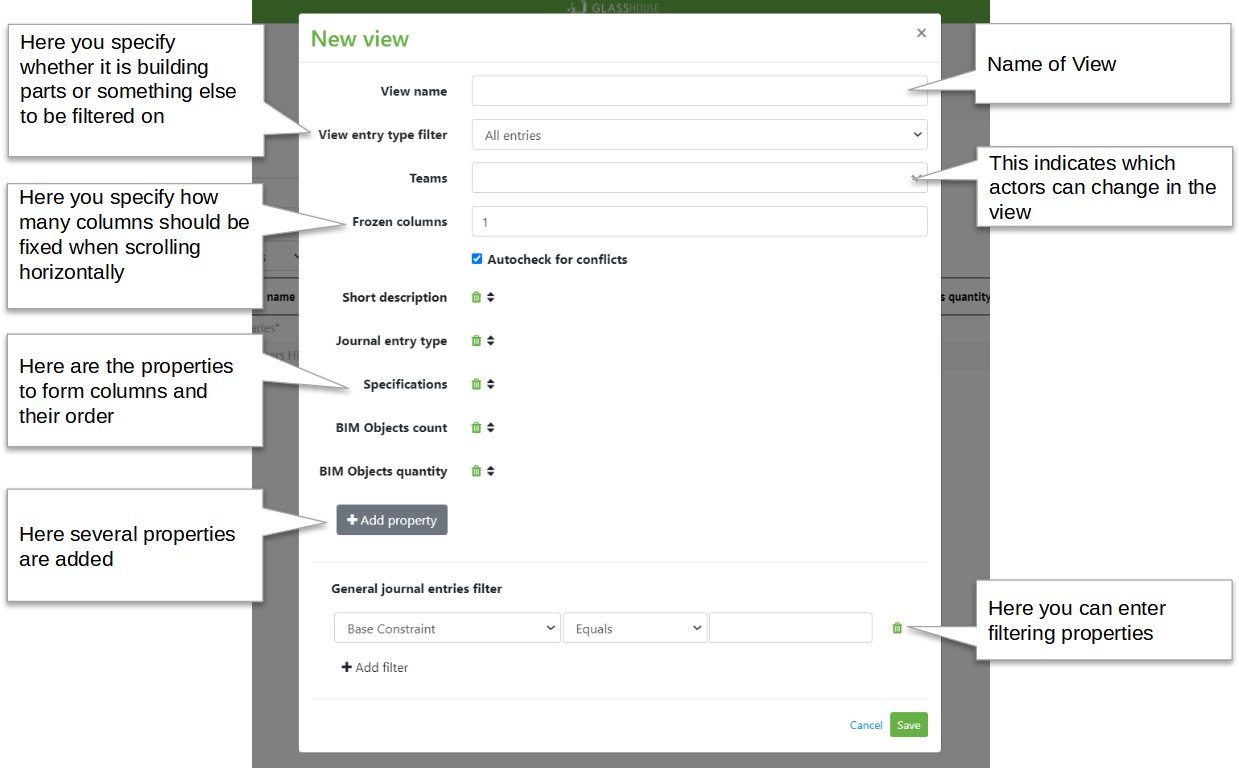
When you create a new view, it’s a good idea to know in advance what you want to see. But it is always possible to go in and change a view.
- View name. This is where you type the name of the new view.
- View entry type filter. Here you specify whether it is building parts, rooms or systems that are shown in the view.
- Teams. Here you specify which actors can modify the view, this way all the construction parties can work in the same journal.
- Frozen columns. Specifies how many columns should be frozen when scrolling horizontally.
- Auto-check for conflicts. If there are two with the same content, this is marked in the journal if this is crossed by
- +Add property. Here several properties are added from both the Bim model and Glasshouse
- General Journal entries filter. Filter properties can be entered here.
Below is an example of a create view for exterior walls with building elements.
Now you know the basics about the Journal, and are ready for the next step: Step 4: Create and work with your descriptions
If you want to read more in detail about the possibilities of linking the Journal to different parts of the project material, you might want to try the following pages before going to the next step in the Getting Started Guide:
- Read more about how to link your descriptions to the Journal
- Work with your BIM model and link it to the Journal
- Link the Journal with Tilbudslister.dk
Click your way back to the previous step: Step 2: Create your first project
Click through to the next step: Step 4: Create and work with your descriptions