On this page we will look at the following:
- How to create building part descriptions
- How to link a description to a building part in the record
- How to create and use documents
- How to print your descriptions to PDF
In addition to keeping your building part journal, Glasshouse can also be easily used to keep your work descriptions and building part descriptions, etc.
Create your first building part description
You can create descriptions from several places in Glasshouse, and in this review we’ll look at the two most commonly used: directly from the journal, and from the Document area.
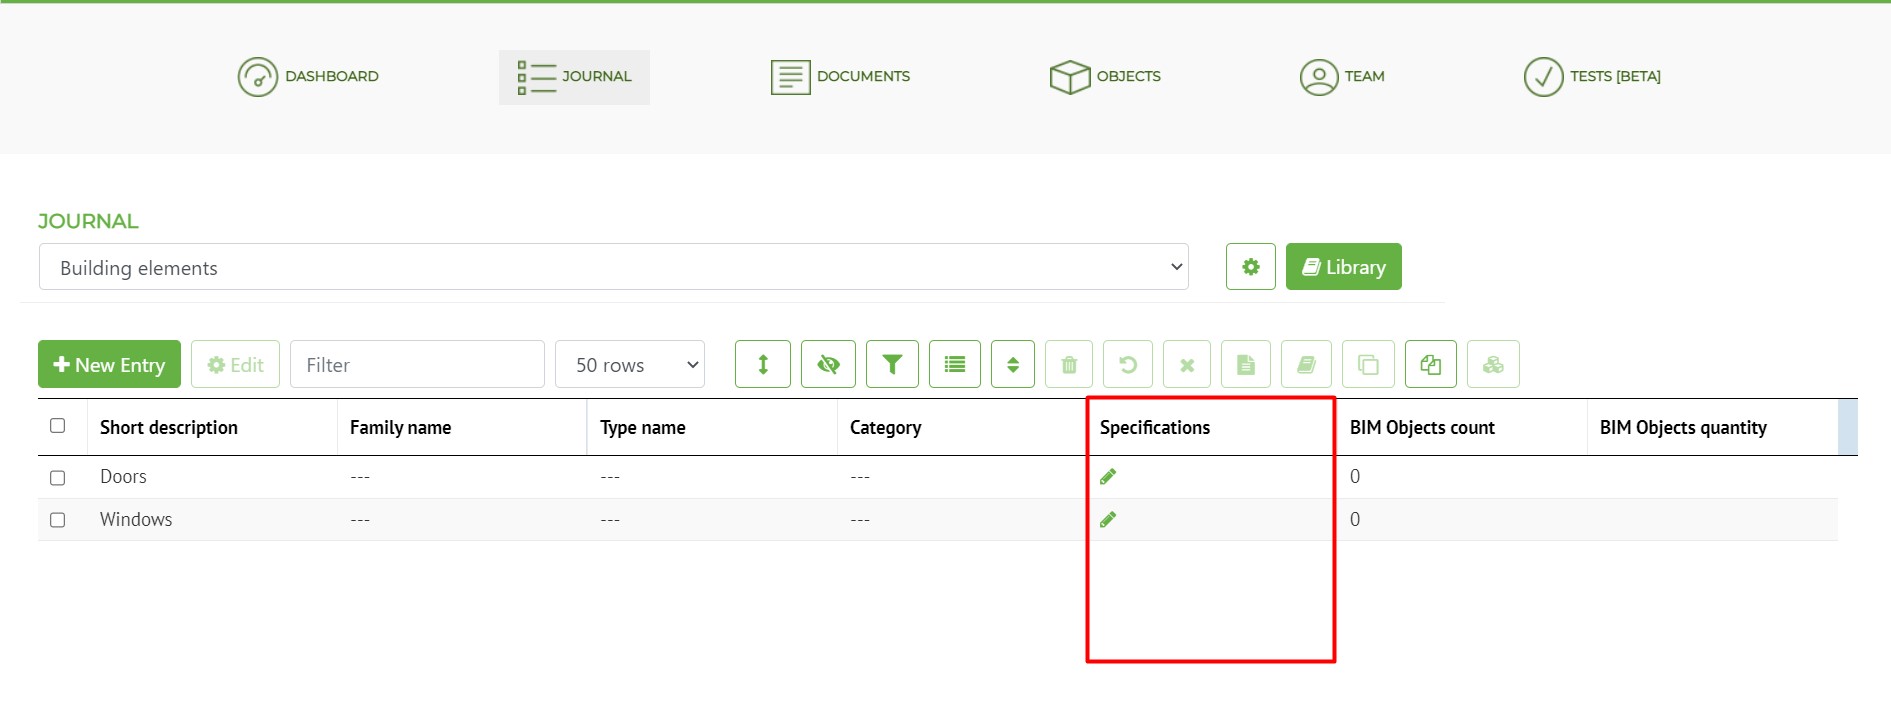
We start with the Journal, where we can see the ‘Specification’ column which is part of the Journal’s default setup. Next to your created building parts there is a pencil icon. This is your shortcut to quickly create a description for your building part.
Pressing the pencil icon brings up a window with specification options.

Here you have 4 options
- Create New Specification from scratch Here you can name a completely new description, this document will be completely empty.
- Create new specification from library Here you create a new specification based on a template from your library
- Link to existing specification Here you link the building part to an existing specification in your project
- Unlink Specifications Here you remove the link between the selected building part and the description
In this case, a completely new description called Doors is created.
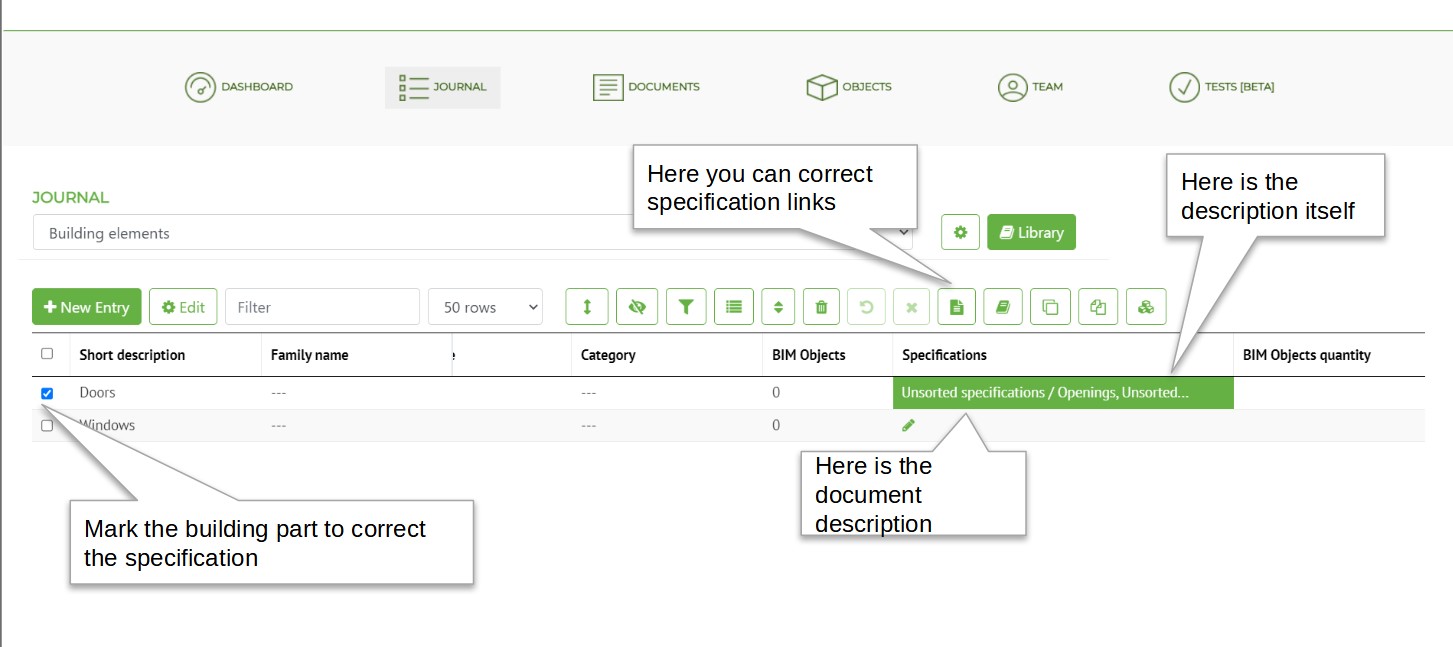
In the Journal the selected building part will now be ‘Unsorted specification/Openings’, which means that the created description is not in a document, we will come back to that.
Clicking on ‘Openings’ will open a preview of the description. This gives a picture of what what the description contains.
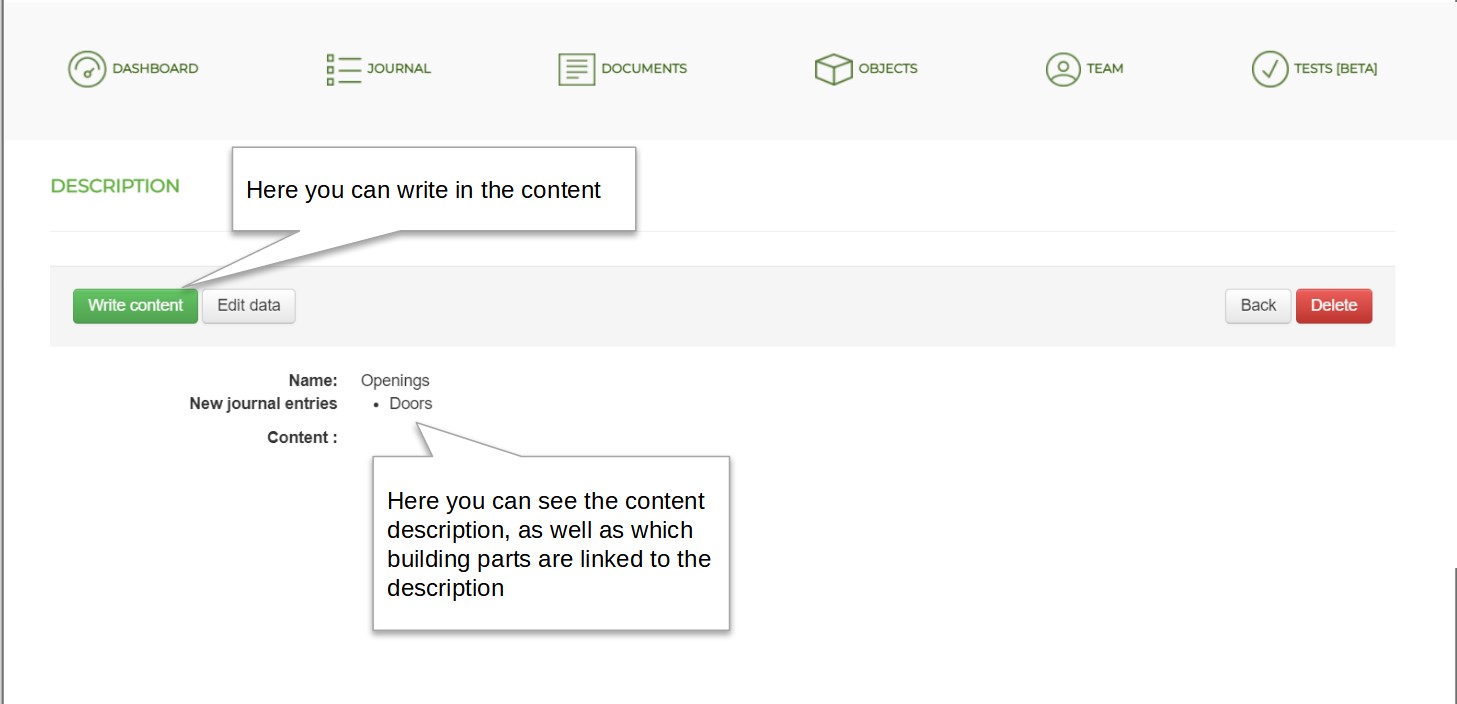
Here you have the possibility to write in the description or to change settings around the description. Here we click on ‘write content’, which will take us to the edit page.
Here it is possible to write the content. The content can be for example a chapter in a job description.
At the top there is a range of editing options, such as ‘heading types’, ‘table’ and bullet formatting. It is also possible to retrieve information from the journal by ‘insert object’.
for more information on editing descriptions click here
Links to Danish content
Documents
Let’s select the ‘Documents’ icon in the navigation bar. This takes us to the area for handling documents and descriptions in Glasshouse.
On the page we can see our just created description, which is located in the document ‘Unsorted Specifications’

Glasshouse works in documents and descriptions.
- Descriptions as we have just worked with, are the concrete text and relation to one or more building parts. Applying the terminology of BIPS, these are sections or building part descriptions.
- Documents are the overall level under which one can sort and order one’s ‘descriptions’.
If we use the terminology of BIPS, these bring together the contents of building documents and work descriptions.
So in short: Documents are the structure, descriptions are the content.
The reason for this division is that it allows the user to quickly restructure his documents, by dragging descriptions around into a new order, or into new documents. A process that in normal word processors is unwieldy and very time consuming.
So we now have our first description, i.e. we have content, but not order. If we choose nothing else when creating a new description, it will always be placed in ‘Unsorted specifications’.
But let’s try to create a new document for our description. To do this, select ‘New Document’ in the upper right part of the page, where you will be presented with two options: 1) ‘Create new document’ and 2) ‘Import from library’. We choose ‘Create new document’. We’ll look at the options with the library later.
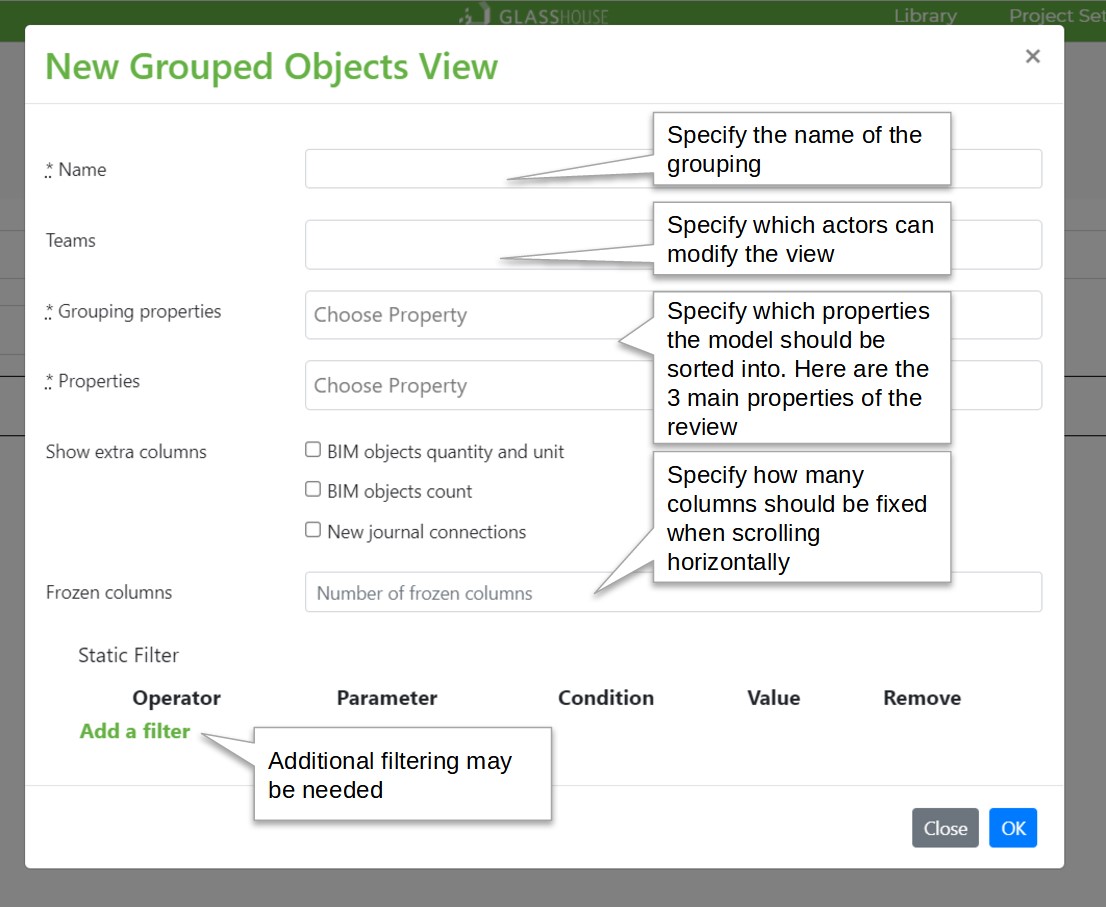
You are now taken to the ‘New Document’ dialog, where you have the option to set a number of things about the new document.
Right now we just need to give it a Name. Then we press ‘OK’ at the bottom of the dialog.
You can read about all the document settings on the Documents help page.
Broken link above

You can now see that a new document with the specified name has been created.
Now we would like to move our description to the new document. We do this by dragging the description from ‘Unsorted specifications’ to the new document using the small cross to the left of the description number.
In this way you can create descriptions and sort them into documents, and if you want to view or print the whole document as a PDF – including all the descriptions – this is done using the download ‘Download PDF’ function, which can be found under the ‘Options’ button (the one with a little gear on the far right next to the document name). The PDF setup may not look exactly as you want, but you can learn much more about this on the Documents help page.
Finally, if you return to the Journal we will see that our new document appears in the ‘Document’ column next to the current building part.
This way we always have our descriptions in order, can see where they are located and can easily see which building parts we need to make descriptions for.
Much more about descriptions, data, setup and layout
The description and document area is a very large area in Glasshouse, with many options and methods to optimize and streamline your description work.
In this review, we have only looked at the very general and basic features, to give a flavor of the concept and possibilities.
You can read about all the other features in depth on the Descriptions and Documents help pages, including:
- How to add data from the journal and from imported BIM models into your descriptions, so that -changes in one place are reflected everywhere
- How to set up the appearance of your documents
- How to link multiple building elements to the same description, so you can minimise the number of descriptions
- How to use the library to store and reuse descriptions
Links to review documents page is empty descriptions redirects to Danish page
Click your way back to the previous step: Step 3: Create your building part record
Click through to the next step: Step 5: Import your BIM model