Link Revit project
In the following page you will learn how to use Glasshouse Journal, and link your BIM data with Glasshouse web app
First step is to link our Revit project with our Glasshouse project.
You can find more detailed explanations in the following links:
http://help.glasshousebim.com/knowledgebase/revit-plug-in/
Click the Quick Sync button to synchronize the model with the Glasshouse web app
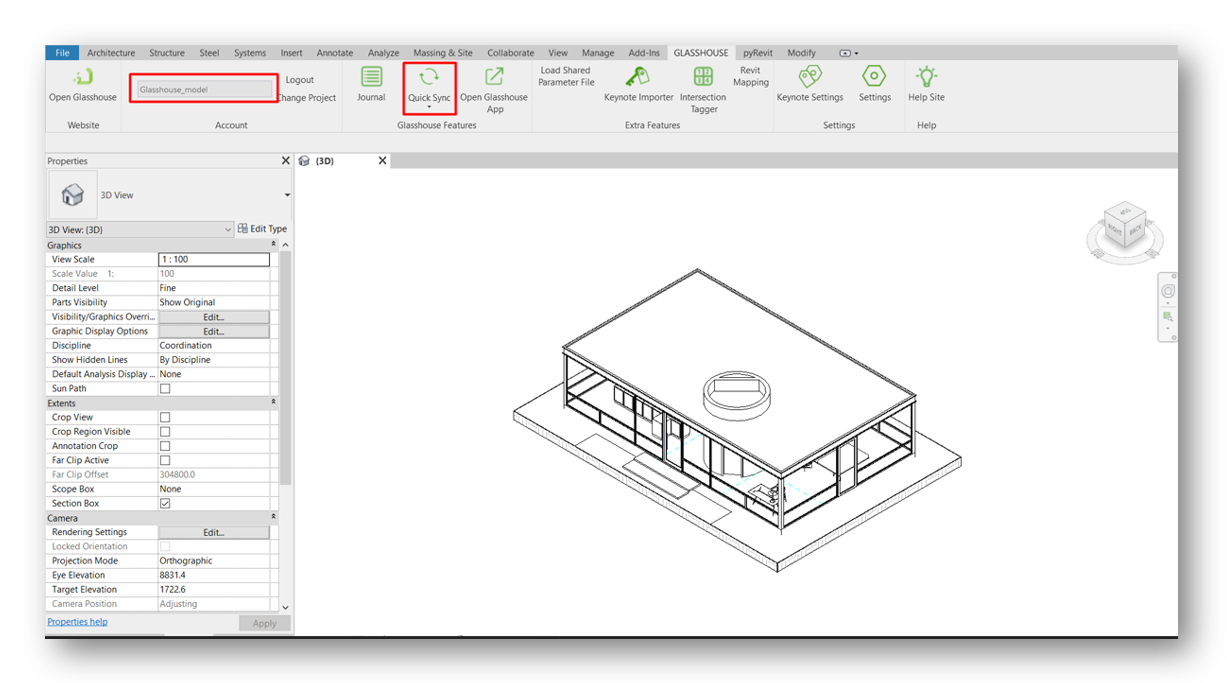
Once your Revit model has been synced with Glasshouse web app the following message should display after upload ” The model has been synced with the Glasshouse project”
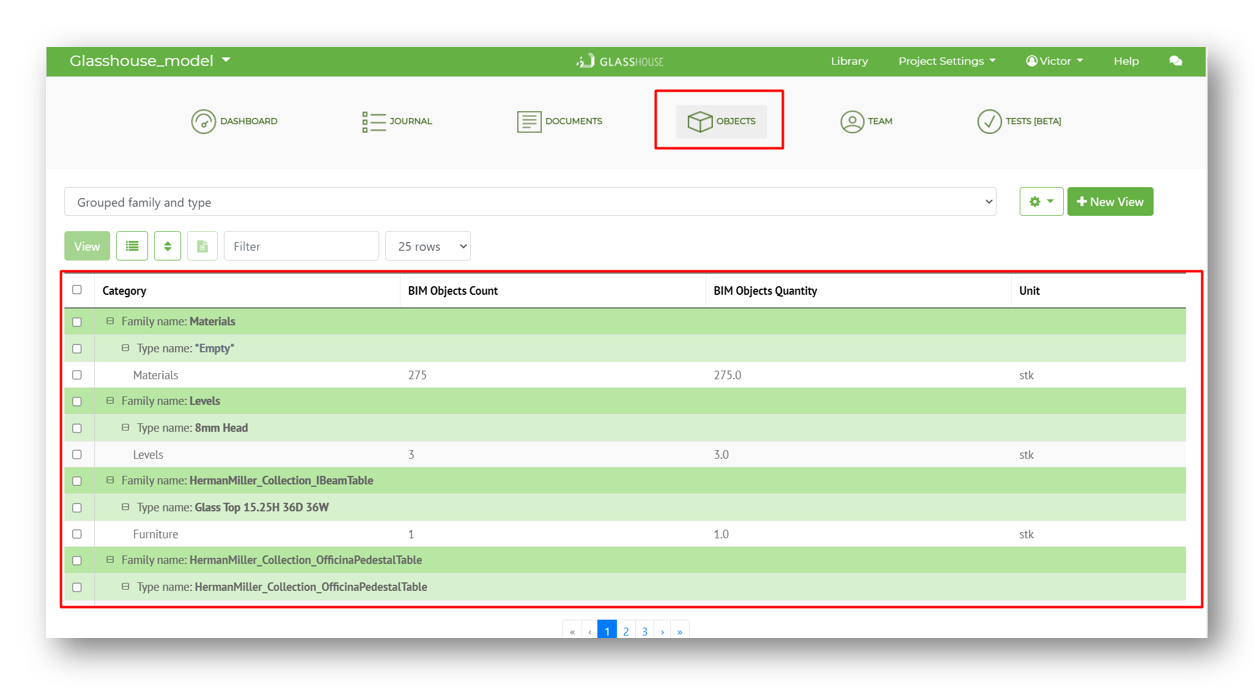
Now we can go to Glasshouse web app in the objects tab, you can now visualize the objects found in the model.
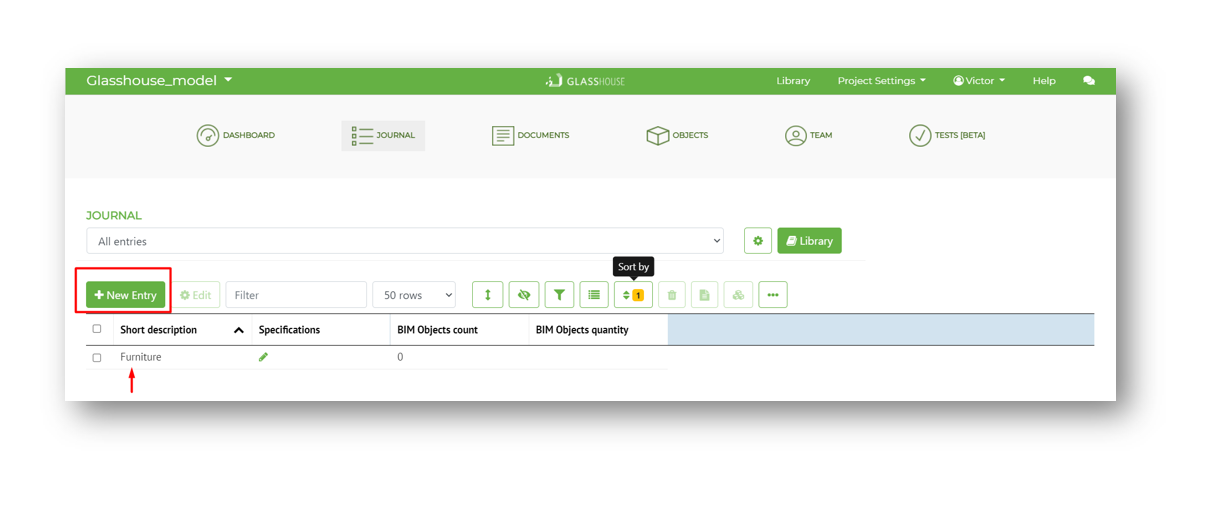
Create a journal In Glasshouse
In glasshouse web app let’s create a new journal for the purpose of this guide, I will create a Journal named “Furniture.”
For more information on how to create a Journal and it’s functionalities visit the following link:
Glasshouse journal in Revit
Click in the Glasshouse toolbar the “Journal” button.
A window will pop up, here you can review the journals that have been created, the views, and begin to interpolate your data between Glasshouse and Revit.
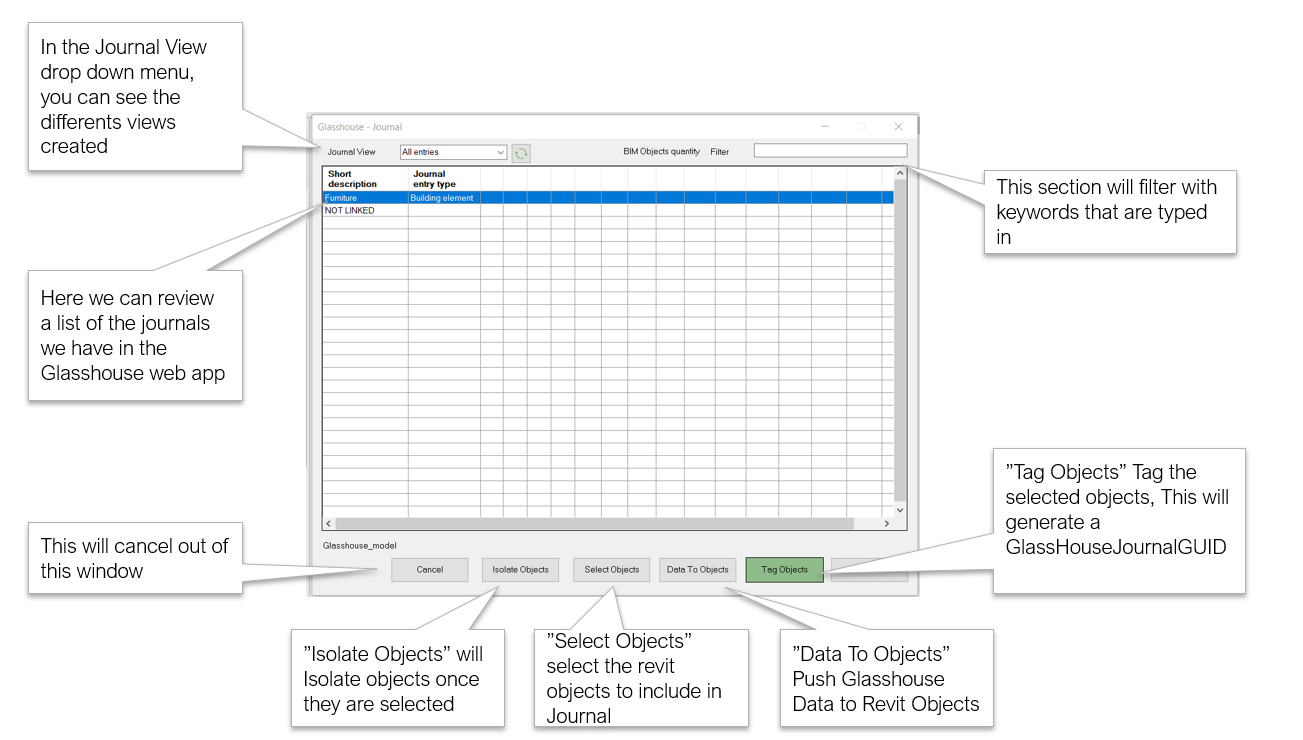
Select Objects
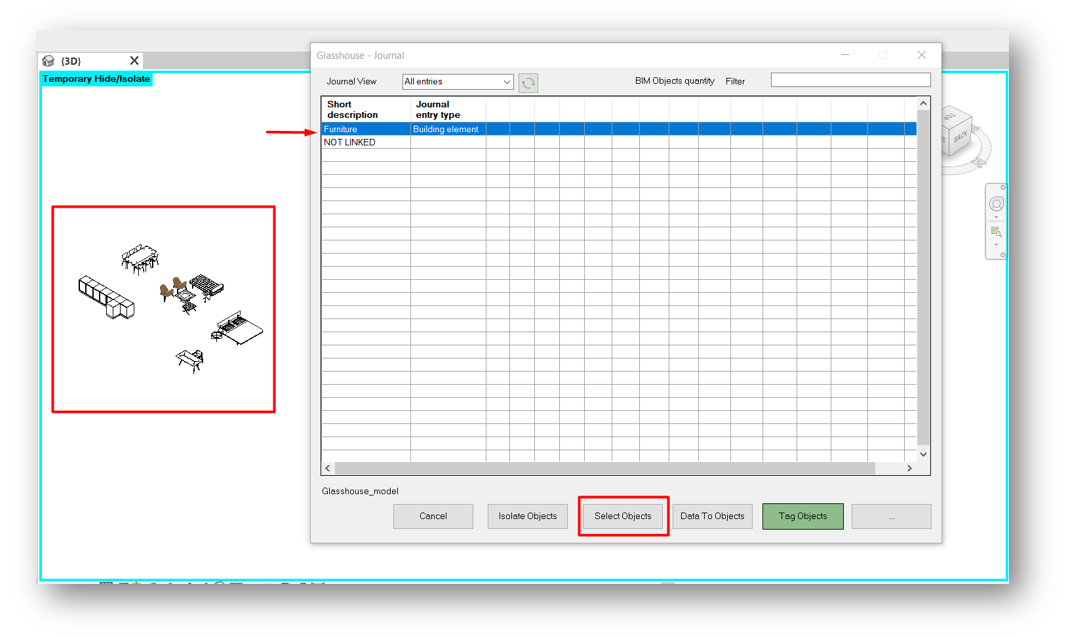
For the use of this guide I will select the “Furniture” objects found in the Glasshouse Revit model.
First select the row of the Journal you wish to link your BIM objects too.
Secondly click on the “Select Objects” button, and then window select the object in the Revit view.
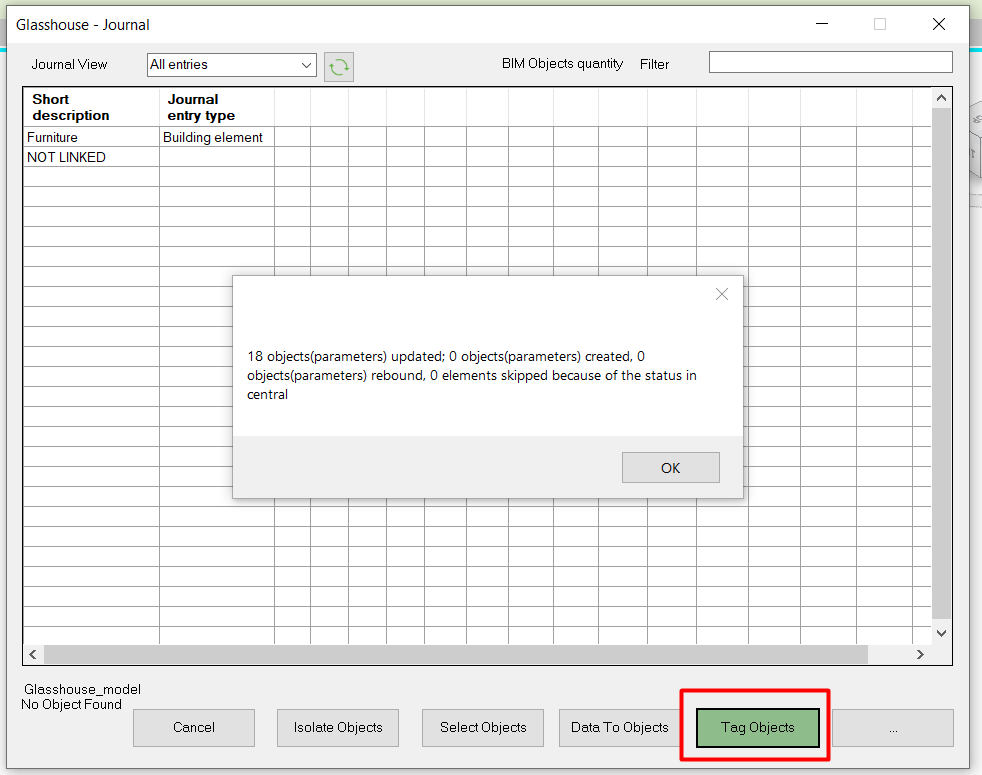
Tag Objects
Now click on the button “Tag Objects” and a pop up window should display showing the amount of objects that have been tagged. When you click on “Tag Objects” Glasshouse will update the selected objects with a “GlassHouseJournalGUID” parameter. This parameter will be the link between Revit and Glasshouse web app. Click on the “Cancel” button this will exit from the Journal window
You can review that the objects have been tagged correctly, by going to the objects properties and seeing the “GlassHouseJournalGUID” parameter with it’s corresponding value for each object.
Quick Sync
Click on the “Quick Sync” button in the Revit Glasshouse toolbar. The plug-in will upload the model to the GlassHouse web app. The following message will display once the upload has been completed.

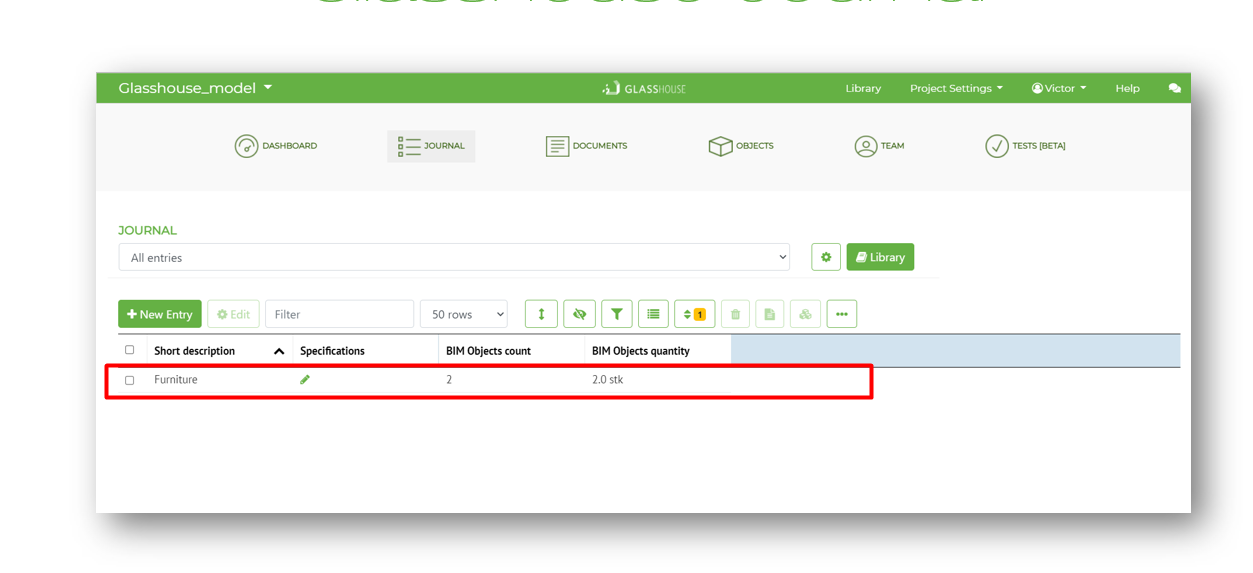
Glasshouse Journal
Click on the “Open Glasshouse App” button found in the Glasshouse features section in the ribbon. This will open your default browser and access the Glasshouse Web App. Click on the Journal icon and now your BIM objects are visible, you can now begin to add data to your BIM objects.